


ALREADY PURCHASED
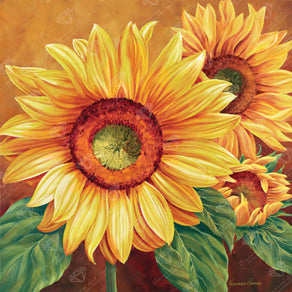
Mystic Rose
Rated 5.0 out of 5
To view pricing in your currency, select your shipping country below.

If you’ve been crafting with diamond art projects for a while, you’ve probably started to notice that some of your diamond painting drills and tools have become oily and sticky over time. Not to worry! This is a common problem when you use your tools to paint with diamonds frequently. Fortunately, there are several ways that you can clean off your supplies in a matter of minutes so you can get right back to your painting.
Over time, you will probably need to replace your drills and other diamond painting accessories as they get old and worn out. However, for now, we recommend keeping a few of each tool and some extra diamond drills on hand so you don’t get stuck trying to clean an oily drill or a grimy tool that’s long gone. Plus, cleaning your equipment regularly prevents build-up and ensures that everything you need will be ready when you want to work on your next project. Read on to discover some of the ways in which diamond painters clean their tools and drills.
As you use your diamond painting drills and other tools, like tweezers and even trays, it’s easy for these items to become sticky and oily because of the regular application of the wax that helps you to pick up the drillss and place them on the canvas. No one wants sticky hands, and oily tools can be difficult to work with, causing some frustration while working on what is supposed to be a relaxing project. If you’re wondering how to clean your diamond painting drills, they’ve probably already reached the point where they’re difficult to work with. Try cleaning off the drills that you have and then remember to clean them regularly to prevent them from becoming too oily and sticky in the future.

If your drills or tools are only moderately oily, sometimes a simple wipe down will work. We prefer to use a baby wipe to clean off the excess wax and oil that becomes attracted to the tools and drills, but you could also use a wet paper towel with a bit of dish soap on it. Remember to rinse your drills off well after a wipe down and let them air dry to prevent any moisture from becoming trapped.
If your 5D diamond painting drills are beyond a mere wipe down clean-up situation, you’ll need to do a more in-depth cleaning. Fill a bowl with warm water and then add a bit of dish soap and sanitizer. Place your drills in a mesh strainer and lower them into the water. Allow them to sit in the mixture for a while — somewhere between 30 and 60 minutes. Pull the strainer out of the water, rinse the drills in fresh water and dry on a plate or paper towel until all moisture is gone. Don’t put your drills away until they are completely dry. If you do so while they are still damp, they’ll likely stick together. They could even get moldy if stored while wet.
You should always have some extra supplies on hand when sitting down to complete a diamond art kit — just in case something goes wrong. Invest in a few different sets of tools and keep extra drills on hand so that if you find something to be too oily and difficult to clean, you can just use a fresh one from your stock. It’s a good idea to keep extras of other materials, too, like wax, in case you start running low mid-project. If you run out of wax altogether, there are some great household alternatives such as blu tack that you can use in its place.
It’s wise to invest in specific storage containers to keep everything neat while also protecting your round drills and square drills from damage. Remember to be diligent about cleaning your drills and other diamond art accessories after using them. This will help you avoid having to throw them away or scrub off residue from the wax later.
Not only can the drills become oily, sometimes a clump of unused drills will cling together as well. You can use the same baby wipe trick here to prevent losing any of your beads while also removing the sticky oil that they are covered in. Carefully dump your sticky drills onto a baby wipe and fold it up well to keep them from falling out of the sides. Rub the wipe around a few times and then carefully transfer them onto a clean, dry cloth or paper towel. When dry, pour your diamond beads back into their containers. Voila! Good as new.
If this doesn’t work, you might need to get a bit more creative. A rolling pin is an excellent tool for unsticking diamond drills that don’t seem to want to budge. Place them in a zippered plastic bag. Put the bag on a hard, smooth surface and then carefully, without a lot of pressure, roll over the drills with your rolling pin. When you’re finished, give the drills a good rinse, and let them dry before using.

While any diamond painting accessory can get dirty, diamond painting pens tend to get seriously grubbyy — especially when they are not thoroughly cleaned between uses. The wax can attract dust, pet hair, and other debris, or it may dry out. Either issue can make it impossible to pick up drills or additional wax. Cleaning your drill placer regularly helps you avoid this problem and enjoy a frustration-free diamond painting experience.
We recommend carefully removing the wax from your diamond painting pen before putting your supplies away after a crafting session. To do this, use tweezers or a toothpick to remove the wax from the pen cavity. If you have a drill pen you haven’t used in a while and it’s full of hardened wax, soak it in a bit of warm water first. This will loosen up the wax in it, allowing you to clean it out. Whether you have a stylus that places one drill at a time, or you prefer using multi-placer tools, this method will allow you to get the maximum use out of this essential supply.
At the end of a long session of diamond painting, you may be tempted to just toss your tools and accessories in a drawer. However, taking just a few minutes to store your diamond painting kit and accessories neatly, helps keep everything clean while preventing damage. In addition to the storage containers you use to hold your drills, consider purchasing a tool kit or storage box to protect larger implimentss and supplies, like your light pad, easel, etc. You can find all sorts of storage solutions at craft stores like Michaels or even on Amazon. If you’re low on funds or are looking for ways to upcycle, you can usually find things you can use as storage containers in thrift stores, too.
In addition to preventing damage and keeping your supplies clean, maintaining an organized storage system means you’ll be able to find all the materials you need in an instant when you’re ready to paint with diamonds again.
If you love completing diamond art paintings, then it’s important that you have all the right diamond art accessories — and that you understand how to clean your diamond painting drills. Use plastic organizers to keep your tools in the same, easy-to-find place. Then, regularly clean your drills by wiping them down after use with a baby wipe or wet towel. Don’t forget to let them completely dry before using them again. For serious crafters, we recommend having a few different placer pen options handy. That way, if one pen becomes too dirty to clean completely or you misplace it right before a project, you’re ready to start in with your back up. Happy painting, friends!


© Disney / Beauty and the Beast™

© Wildbrain / Strawberry Shortcake


Diamond Art Club Save 20% by using our app!