

ALREADY PURCHASED
Mystic Rose
Rated 5.0 out of 5
To view pricing in your currency, select your shipping country below.
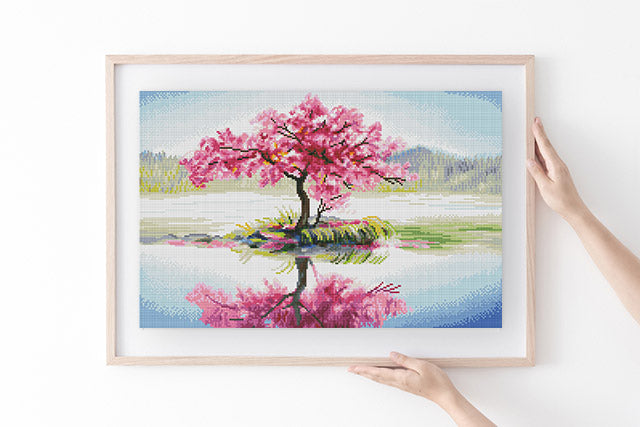
After spending several weeks (or even months) completing a shimmering piece of diamond painting, one big question still remains: How do I display my masterpiece?
Whether you are keeping it for yourself or giving it as a gift, you need a beautiful display that’s worthy of showcasing the creation you spent so much time making. Fortunately, there are plenty of options for showing off completed diamond art kits. Depending on your skill level, budget and creativity, you can create everything from simple frames that let your artwork shine to gorgeous displays worthy of art galleries.
Check Out Our Diamond Art Kits!
Here at Diamond Art Club®, we have seen all sorts of creative display options, but a couple of our favorites are DIY floating frames for canvas and magnetic poster frames. If you have been wondering how to frame a diamond painting, keep reading to learn more about these beautiful and straightforward techniques.
Before you dive into making a frame for your completed diamond paintings, take some time to consider your skills and what you have available to you. Safety should always be your primary concern. If you have never worked with power tools before, do not attempt to complete one of these projects on your own. Instead, ask for help from someone who has more experience and can teach you how to use these potentially dangerous tools safely.

Making a floating frame is an excellent option when you really want to let your diamond art shine. This type of frame is different from a typical frame because it is built to be slightly larger than the artwork. This creates a small gap between the frame and the art and results in the illusion your diamond painting is floating.
Float frames are relatively easy to make, but you do need a few power tools. You’ll need some basic building skills, too. If you are not familiar with using power tools, stay safe by asking for help from someone with more experience. Ready to give this project a try? Let’s get started!
To make a floating frame for displaying your diamond art, you’ll need the following supplies and tools:

The length of the boards you’ll need varies depending on the size of your canvas. For this post, we’ll be making a frame for a 24”x30” canvas. You may need to make adjustments to make this project work for your diamond painting.
To make a frame for a 24”x30” canvas with a ¼” gap between the frame and canvas, you’ll need boards of the following sizes:
Front:
Back:
Adjust the length measurement as needed to obtain the desired result if your canvas is larger or smaller.
Once you have all the necessary tools and materials and your boards have been cut to size, it’s time to start putting together your frame.
Use your miter saw to cut the thin edges of your front boards and the wide edges of your back boards. You can do this by hand if you do not have a miter saw, but the results are much neater when the cuts are made with the appropriate tool. Next, adhere the corners using wood glue and secure them with clamps. Add nails at the top and bottom of the frame in each corner for extra security.
After finishing the outside frame and letting the glue dry, start fitting the back pieces into the frame. You may need to trim them slightly to make them fit. Apply a bead of wood glue to the miter cut long edge of the board that fits inside the frame and then affix inside the outside frame. These boards should be flush with the back side of the frame.
Fill the holes using your wood filler and then sand smooth. Be sure to use a filler the same color as the wood. Once it has dried completely, sand smooth using fine-grit sandpaper. If you would like to stain your frame, do so now. If not, go ahead and seal it using a water-based varnish. Consider applying an acrylic coating to make your new frame easy to clean and protect it from moisture. Just be sure to choose a product that will not yellow over time.
Secure the canvas to the frame using flat head screws. Attach at multiple points to stretch out the canvas and keep your artwork straight. Take your time while doing this to ensure the perfect placement and to prevent diamonds from falling off.
After mounting the canvas, attach the picture wire to the back. For best results, secure the wire to the inside edges of the frame backing pieces. This ensures there won’t be any wires or screws protruding from the back to potentially scratch your wall. It also allows the frame to fit flush against the wall without any awkward gaps.
Once you’ve attached the picture wire, your artwork is ready to be displayed. While this frame requires a bit of DIY know-how and a few power tools, it is a great weekend project. And after mastering the process, you can adjust the dimensions to make frames for all of your artwork.

If you are in a hurry or are just looking for an easier option, making a DIY magnetic frame poster may be a better option for you. While a saw comes in handy in this project, you don’t need one. And you don’t need to worry about making miter cuts and making corners match up perfectly. This type of frame also has a sleek, modern look and allows you to change out your artwork easily.
Let’s dive in!
One of the best parts about this frame is it does not require a lot of supplies. This makes shopping easier and means you will not have to spend a small fortune just to display your diamond art. To make a magnetic poster frame for displaying diamond paintings, you’ll need:

When sourcing scrap wood, look for pieces slightly wider and thicker than your magnets.
Measure your artwork and decide how large you would like the frame to be. If you are not sure, making the frame the same width as your artwork works well. Measure out the desired length on each of your pieces of wood and mark where to cut. Then, carefully cut the wood to size with your saw. If you do not have access to a saw, you may need to purchase craft wood from your local hardware store and ask them to cut it to the appropriate length.
Measure in about three inches from each end of the wood and place marks to indicate where the magnets will go. Ideally, the magnets should not be too close together or too far apart. Adjust the distance accordingly. In addition, if you are hanging a large piece of diamond art with a substantial amount of weight, consider adding more than two magnets for maximum security. Just make sure they are evenly spaced across the wood.
Using your drill and Forstner bit, carefully drill out each of the holes. Do not drill all the way through the wood. You only need to make the holes deep enough for the magnets to rest inside. When you are finished, they should be flush with the wood.
Use a strong adhesive to adhere the magnets inside the holes. The frame will essentially be a magnetic sandwich that holds your artwork in place when you are finished. For this reason, it is vital to make sure the magnets are lined up with each other and facing the right direction. One of the opposite poles needs to be facing up on each end to ensure the two sides of the frame will be attracted to each other rather than repelled.
There are a few different options when it comes to hanging your frame. We recommend using either metal picture hangers or small eye hooks and a string. If you would like to use a regular metal picture hanger, flip your frame over and secure a hanger to the back. Make sure the nails are small enough they will not go the entire way through the frame!
For the other option, drill a small hole into each end of one of your wood strips. Then, screw a small eye hook into each hole. Cut a piece of string to the desired length and then attach each end to an eye hook. For a fancier look, try using a lightweight chain instead of regular string.
Carefully pull the two sides of the frame apart. Align the top edge of your diamond art painting with the top edge of the back frame piece. Adjust and center if needed and then place the front part of the frame on top. The magnets should attract each other and hold your artwork firmly in place.
Congratulations! Your newly framed diamond art masterpiece is now ready for display.
If you find your artwork does not hang as neatly as you would like, you can solve this problem by making another magnetic bar to attach to the bottom of the art. And if you’re having trouble with the art slipping out of the top frame, add a few extra magnets to help hold it in place.
To give this frame a more professional finish, consider painting the wood or using something like oak or cherry and applying a nice stain. This project is highly versatile, so you can make it as simple or as fancy as you would like.
There is nothing quite like the satisfaction that comes from completing one of the best diamond painting kits on the market. Even if you are not good at traditional art forms like painting and drawing, you can create absolutely breathtaking diamond artwork you will be proud to display around your home or office and give as gifts.
Browse Our Best Diamond Painting Kits
If you are like many diamond artists, though, you might have a hard time figuring out the best way to frame and hang your completed projects. With the DIY frames listed above, you can easily frame paintings of all sizes using materials you can find at any hardware store. Whether you are a skilled crafter or a novice, these projects are appropriate for all skill levels — as long as you take great care to be safe when using power tools.
Of course, these certainly are not the only ways to frame your creations. You can also place your completed artwork in a regular frame, stretch the canvas with stretcher bars or have your masterpiece professionally framed. No matter which option you choose, your masterpiece will look fantastic hanging on the wall.
At Diamond Art Club®, we sell only the best diamond painting kits featuring vibrant colors, breathtaking designs and unparalleled quality. If you are looking for your next display-worthy project, check out our full selection today!
Image Credits:
Ekaterina Rybina/Shutterstock.com
SuperAk/Shutterstock.com
Followtheflow/Shutterstock.com
Jon Rtz/Shutterstock.com
GO DESIGN/Shutterstock.com


© Disney / Beauty and the Beast™


© Wildbrain / Strawberry Shortcake


Diamond Art Club Save 20% by using our app!