
ALREADY PURCHASED
Cancer
Rated 5.0 out of 5
To view pricing in your currency, select your shipping country below.
Date
February 28, 2020Time reading
5 minutes
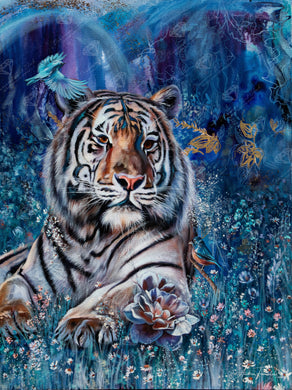
Diamond painting is a wonderful way to reveal your artistic side, even if there’s not a single crafty bone in your body. Using an applicator tool and wax, you scoop up diamonds and set them on an adhesive canvas which features a color-coded chart. In other words, it’s so easy, even a child could do it! But even experienced crafters feel the draw to this mesmerizing hobby.
But this is more than a fun and engaging hobby. Since diamond painting can be considered a form of mindfulness-based art therapy (MBAT), you can even find peace, clarity and happiness all while expressing creative energy.
However, if you have just discovered the world of diamond painting, you might be confused about the tools and accessories that come along with each kit. You may be wondering what is actually included or what you need to go out and purchase. Plus, there is an array of other additional accessories you can include to complete your diamond art studio.

From basic diamond painting supplies to light pads to frames, we’re going to walk you through what you need and what would be nice to have.
From drills and pens to light pads, here are the basic diamond painting supplies to prepare you for this wonderful and relaxing new hobby.
Shop Our Collection of Diamond Painting Tools
The absolute primary tool you need for diamond painting is an applicator pen. There are two main diamond art pens from which to choose: drill pens and wax pens. Let’s take a look at how each type is used:
Diamond drill pens–Drill pens are the more traditional option, and they’re included within each diamond painting kit. With this type of pen, simply dip it into the wax or glue and pick up the diamond. Next, you drop it into position on the canvas.
Diamond wax pens–Wax pens apply wax directly to the diamond piece, eliminating the extra step. When a pen begins to run low on wax, you simply sharpen it and promptly get back to enjoying your kit.
Diamond drill wheel pick-up pen–These pens offer an adhesive wheel on one end that allows you to easily grab diamonds by rolling it across a tray. You can also roll it across to place diamonds down and even remove them.

It’s also important to note that every diamond art kit comes with glue or wax to get you started, so there’s no need to seek out this accessory.
Another practical accessory is the diamond painting light pad. Not only can a light pad illuminate each diamond from beneath, making a dazzling display, but it can reduce eye strain as well. Diamond painting light pads are especially useful in making sure each diamond piece is placed in its respective spot, eliminating accidents and mistakes. This way, you know exactly where that drill needs to go! Of course, light pads can be battery-operated or rechargeable.
The diamond art light pad offered on this site has numerous advantages. For starters, it’s thin (0.2-inch thickness), compact (14 x 10-inch size) and lightweight (1.32 pounds), allowing you to carry it practically anywhere you want.
It’s not battery-operated which means you don’t have to worry about keeping batteries on hand. Instead, it’s simply connected by a 3.3-foot USB cable through personal devices such as a PC, phone adapter or power bank.
Another advantage of this diamond art light pad is that it is a flicker-free LED lamp, meaning you will experience less eye strain and headaches. This is especially important if you suffer from migraines. LED lamps also project a brighter surface area.
This light pad also has a long life span and 50,000 hours of continuous use. Now, that’s a lot of time spent enjoying diamond art! It also includes a one-year warranty should anything happen.

Each diamond art kit will include some sort of adhesive whether it’s glue or wax. Using your pen’s hollow nib, you scoop up the glue and then the diamond drill. This is meant to make it easy to transfer each colored gem to their location without dropping. Once you find its location, you transfer the drill to the adhesive canvas. And there’s no need to reapply the glue. You can use the same dabbed droplet again.
You can find numerous online tutorials that teach you how to use the glue. If diamond art painting is new to you, go find a few to familiarize yourself with the techniques.
If you truly want to complete the ultimate diamond art painting studio, a craft table or easel is the perfect additional accessory. However, there are several features of a table or easel you should consider.
Diamond Painting Workstation: How to Create the Perfect Studio
Angled and Height Adjustable–Choose a craft table which offers an angled position, sparing you from working hunched over which can create bad neck aches. In the same vein, make sure it is height adjustable as well.
Transparent Surface–Consider a glass craft table for your diamond art station. This way you can treat it as a giant light pad, shining a spotlight from beneath.
Storage Compartments–Storage compartments are a handy feature too! That way, you can store your beads and pens safely away should you have pets or small children who tend to put tiny objects in their mouths.

At the very least, you should get yourself an easel or drawing board that tilts. Having a tiltable easel, again, can save you from poor posture and neck strain. The beauty of an adjustable drawing board is that you can place it on any existing table. If you prefer to work at the kitchen table, where there is lots of natural sunlight, an easel or drawing board offers a versatile, movable solution.
Besides having a proper table or workspace, also consider getting a comfortable, ergonomic chair. Sitting for long lengths of time can really do numbers on your posture, causing neck aches and even back aches. So do yourself a favor and get a chair that you can sit in for hours as you enjoy your diamond art.
Try out different chairs, but ultimately settle on one with an adjustable backrest that follows the shape of your spine. Also, make sure your feet rest on the floor or, if you prefer sitting higher, that they have a foot brace. While you’re not placing a diamond, make sure the armrests are close by so you can allow your shoulders to relax. In general, your chair’s arm height should be equal to your desk’s height.

Speaking of storage compartments, it’s helpful to find a way to keep your diamonds and gems neatly organized. This way, you can dive right in to it without having to spread everything out or clean up previous messes. Here are some storage solutions to keep your diamond painting hobby systemized and stress-free.
With this 30-slot diamond organizer, you can easily keep track of all your colored diamonds. Each of the 30 individual containers has a screw-on lid and rests inside a larger, handy organizer case. With this container, you’re sure never to lose a single diamond ever again!
For a more affordable, budget-friendly option, use these diamond painting tricks, tips and hacks. You can also use a recycled egg carton or simply sort diamonds into plastic baggies, labeling each with their corresponding number or symbol.
Accidents happen from time to time, and diamonds tend to walk off and go missing. So occasionally you may need extra diamonds. Whatever shape you prefer, round drill or square drill, be sure to order extra diamonds in the same shape for your masterpiece.
When you choose a diamond art kit, your kit will tell you which diamonds it includes. However, should you forget or toss away the kit, here are the three main types of diamonds:
Round diamonds– Easy enough for kids, and fast to use.
Square diamonds– Mosaic tile-style diamonds that snug nicely, edge-to-edge.
Aurora Borealis (AB) diamonds– Found in select paintings, AB diamonds give off an iridescent rainbow effect like that of the Northern Lights.

As with any hobby that requires eye-hand coordination, having a magnifier offers a clearer scope and really gets in there to see where you’re headed with that diamond piece. And a folding magnifier is perfect for those who have trouble seeing small parts or who are far-sighted. Even better–use a magnifying glass that includes an LED light.
While all of Diamond Art Club kits include a small tray to keep gems neatly and close at hand, some prefer to have a larger tray. You can find much more spacious trays with a bigger pour-spout, allowing you to line up your rhinestones for a more organized system. Most larger diamond trays also come equipped with stainless steel tweezers to shuffle the tiny diamonds around without scratching them.
Once you have completed your masterpiece, you may want to frame it! Luckily, it’s quite easy to frame your diamond art piece, and it only takes a few steps. Follow Diamond Art Club’s more thorough, step-by-step instructions on how to frame a diamond painting.
Learn How to Frame a Diamond Painting Here
Use a standard-size frame bought at your local hobby or art supply store. You can find various frame styles and finishes to suit your existing decor. However, keep in mind that many diamond paintings do not come in standard sizes, so you may need to trim down your canvas to fit. One tip is to aim for a frame that’s a bit smaller than your diamond art masterpiece. Another tip is to frame the artwork without the glass; otherwise, it could dull the glimmering vibrancy of the diamonds.
Stretcher bars are perfect for framing your canvas diamond art piece. Plus, they can be found in various shapes and sizes. Just be sure to measure your painting first and decide if you’d like the artwork to stretch around the canvas’ edges or if you’d prefer to have a border. You will also need staples and a staple gun to hold it in place. Alternatively, you could use U-nails to secure the canvas in a cleaner, neater style.
Should you choose a stretcher bar frame, ensure it comes with wall-mounting hardware or grab yourself a pack if not. You will need to attach it to the back of the top stretcher bar in order to hang it.

Lastly, you could mount your diamond art piece onto an art canvas. Make sure the canvas is at least two-inches smaller in length and width to ensure your diamond art canvas can stretch around it. Next, cover the back of the canvas with craft glue, spreading it evenly, except along the edges. On a cutting mat, press the glued blank canvas onto the diamond art canvas as it’s still wet, center it and trim the edges leaving two-inches. One important note here is to be sure to allow the glue to thoroughly dry and adhere before you hang it.
Of course, if you like, have your diamond art piece professionally framed! If you can’t decide or choose between a frame you like, you can customize the look yourself. Drop by a frame shop or standard craft store to achieve the exact look you want!
With diamond art taking off as a new hobby, there are new accessories being discovered and created every day. There are even diamond art enthusiasts making their own gadgets and accessories to meet their personal needs to help them achieve their masterpiece.
Find an accessory that inspired you to get crafty with diamond art? We want to hear about it!


© Wildbrain / Strawberry Shortcake

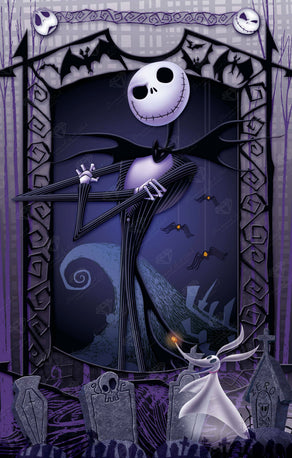
© Disney / The Nightmare Before Christmas™


© Viacom / Avatar: The Last Airbender


Diamond Art Club Save 20% by using our app!